This algorithm is used for thinning binary image. Binary image by definition, consists of only black and white pixels. Here, in the code bellow, Black is denoted as 1 and white is denoted as 0. A result of thinning using this code is as seen in the image below. 
 8 neighborhood :
  Equations :
  Step 1 conditions for selecting black points to remove
  Step 2 conditions for selecting black points to remove
 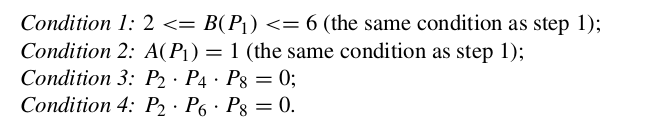 Code For Thinning in Java:
package imageProcessing.service;

import imageProcessing.model.Point;

import java.util.LinkedList;
import java.util.List;

/**
 * Created by nayef on 1/26/15.
 */
public class ThinningService {
    /**
     * @param givenImage
     * @param changeGivenImage decides whether the givenArray should be modified or a clone should be used
     * @return a 2D array of binary image after thinning using zhang-suen thinning algo.
     */
    public int[][] doZhangSuenThinning(final int[][] givenImage, boolean changeGivenImage) {
        int[][] binaryImage;
        if (changeGivenImage) {
            binaryImage = givenImage;
        } else {
            binaryImage = givenImage.clone();
        }
        int a, b;
        List<Point> pointsToChange = new LinkedList();
        boolean hasChange;
        do {
            hasChange = false;
            for (int y = 1; y + 1 < binaryImage.length; y++) {
                for (int x = 1; x + 1 < binaryImage[y].length; x++) {
                    a = getA(binaryImage, y, x);
                    b = getB(binaryImage, y, x);
                    if (binaryImage[y][x] == 1 && 2 <= b && b <= 6 && a == 1
                            && (binaryImage[y - 1][x] * binaryImage[y][x + 1] * binaryImage[y + 1][x] == 0)
                            && (binaryImage[y][x + 1] * binaryImage[y + 1][x] * binaryImage[y][x - 1] == 0)) {
                        pointsToChange.add(new Point(x, y));
//binaryImage[y][x] = 0;
                        hasChange = true;
                    }
                }
            }
            for (Point point : pointsToChange) {
                binaryImage[point.getY()][point.getX()] = 0;
            }
            pointsToChange.clear();
            for (int y = 1; y + 1 < binaryImage.length; y++) {
                for (int x = 1; x + 1 < binaryImage[y].length; x++) {
                    a = getA(binaryImage, y, x);
                    b = getB(binaryImage, y, x);
                    if (binaryImage[y][x] == 1 && 2 <= b && b <= 6 && a == 1
                            && (binaryImage[y - 1][x] * binaryImage[y][x + 1] * binaryImage[y][x - 1] == 0)
                            && (binaryImage[y - 1][x] * binaryImage[y + 1][x] * binaryImage[y][x - 1] == 0)) {
                        pointsToChange.add(new Point(x, y));
                        hasChange = true;
                    }
                }
            }
            for (Point point : pointsToChange) {
                binaryImage[point.getY()][point.getX()] = 0;
            }
            pointsToChange.clear();
        } while (hasChange);
        return binaryImage;
    }

    private int getA(int[][] binaryImage, int y, int x) {
        int count = 0;
//p2 p3
        if (y - 1 >= 0 && x + 1 < binaryImage[y].length && binaryImage[y - 1][x] == 0 && binaryImage[y - 1][x + 1] == 1) {
            count++;
        }
//p3 p4
        if (y - 1 >= 0 && x + 1 < binaryImage[y].length && binaryImage[y - 1][x + 1] == 0 && binaryImage[y][x + 1] == 1) {
            count++;
        }
//p4 p5
        if (y + 1 < binaryImage.length && x + 1 < binaryImage[y].length && binaryImage[y][x + 1] == 0 && binaryImage[y + 1][x + 1] == 1) {
            count++;
        }
//p5 p6
        if (y + 1 < binaryImage.length && x + 1 < binaryImage[y].length && binaryImage[y + 1][x + 1] == 0 && binaryImage[y + 1][x] == 1) {
            count++;
        }
//p6 p7
        if (y + 1 < binaryImage.length && x - 1 >= 0 && binaryImage[y + 1][x] == 0 && binaryImage[y + 1][x - 1] == 1) {
            count++;
        }
//p7 p8
        if (y + 1 < binaryImage.length && x - 1 >= 0 && binaryImage[y + 1][x - 1] == 0 && binaryImage[y][x - 1] == 1) {
            count++;
        }
//p8 p9
        if (y - 1 >= 0 && x - 1 >= 0 && binaryImage[y][x - 1] == 0 && binaryImage[y - 1][x - 1] == 1) {
            count++;
        }
//p9 p2
        if (y - 1 >= 0 && x - 1 >= 0 && binaryImage[y - 1][x - 1] == 0 && binaryImage[y - 1][x] == 1) {
            count++;
        }
        return count;
    }

    private int getB(int[][] binaryImage, int y, int x) {
        return binaryImage[y - 1][x] + binaryImage[y - 1][x + 1] + binaryImage[y][x + 1]
                + binaryImage[y + 1][x + 1] + binaryImage[y + 1][x] + binaryImage[y + 1][x - 1]
                + binaryImage[y][x - 1] + binaryImage[y - 1][x - 1];
    }
}
package imageProcessing.model;

/**
 * Created by nayef on 1/27/15.
 */
public class Point {
    private int x;
    private int y;

    public Point(int x, int y) {
        this.x = x;
        this.y = y;
    }

    public int getX() {
        return x;
    }

    public void setX(int x) {
        this.x = x;
    }

    public int getY() {
        return y;
    }

    public void setY(int y) {
        this.y = y;
    }
}
Results: before
1100111
1100111
1100111
1100111
1100110
1100110
1100110
1100110
1100110
1100110
1100110
1100110
1111110
0000000
after
1100111
1000001
1000001
1000111
1000100
1000100
1000100
1000100
1000100
1000100
1000100
1000100
1111100
0000000
The equations and images of equations have been taken from book Character Recognition Systems: A Guide for Students and Practitioners by by Mohamed Cheriet, Nawwaf Kharma, Cheng-Lin Liu and Ching Suen .

The algorithm not works for me, nothing was changed. You can provide an algorithm using BufferedImage? And why you use int[][] bug the image is binarized (byte[][]) ?
this algorithm is for thinning binary image. thats why a 2D array of 0s and 1s is used to represent image. here i used 1 to show foreground(black pixel) and 0 for background(white pixel)
as for buffered image, if its gray scale then you need to binarize it first and then apply this method.. if the buffered image is color, then first grayscale it and then binarize it and then thin it.
summary is it only works for binary image.
Take a look at the code snippet in the next comment.
i work this algorithm with bw image. and still i didnt get the result. if i input image as input then i should get image as output too isnt it? or i have misunderstood?
Code speaks a lot more than words do. take a look at the following code snippet and let me know if it helps
package thinning;

import java.awt.Color;
import java.awt.image.BufferedImage;
import java.io.File;
import java.io.IOException;
import javax.imageio.ImageIO;

/**
 *
 * @author nayef
 */
public class Main {

    /**
     * @param args the command line arguments
     */
    public static void main(String[] args) throws IOException {

        BufferedImage image = ImageIO.read(new File("/home/nayef/Desktop/bw.jpg"));

        int[][] imageData = new int[image.getHeight()][image.getWidth()];
        Color c;
        for (int y = 0; y < imageData.length; y++) {
            for (int x = 0; x < imageData[y].length; x++) {

                if (image.getRGB(x, y) == Color.BLACK.getRGB()) {
                    imageData[y][x] = 1;
                } else {
                    imageData[y][x] = 0;

                }
            }
        }

        ThinningService thinningService = new ThinningService();

        thinningService.doZhangSuenThinning(imageData);

        for (int y = 0; y < imageData.length; y++) {

            for (int x = 0; x < imageData[y].length; x++) {

                if (imageData[y][x] == 1) {
                    image.setRGB(x, y, Color.BLACK.getRGB());

                } else {
                    image.setRGB(x, y, Color.WHITE.getRGB());
                }


            }
        }

        ImageIO.write(image, "jpg", new File("/home/nayef/Desktop/bwThin.jpg"));

    }
}
input image

ThinnedImage

im using your bw tree picture as the sample
and
the output when
thinning.ThinningService$Point@26d6466f
thinning.ThinningService$Point@26d6466f
thinning.ThinningService$Point@26d6466f
thinning.ThinningService$Point@26d6466f
thinning.ThinningService$Point@26d6466f
endlessly.
is there possibilities it when wrong when i change the path to
“C:/Users/Dhia/Desktop/KEJE BANYOK JE/fyp/data/bw1.jpg”
i think you are using windows, and the file path is wrong in that case. (spaces in the folder name wii be a prb as well). i am surprised you didnt get an exception.
see this http://msdn.microsoft.com/en-us/library/windows/desktop/aa365247(v=vs.85).aspx#paths
Also i cant be sure of your exact problem without seeing the code. Do a try catch around file reading and print stack trace. that can be helpful to figure out the problem.
when i was doing my program
i got some error in:
for (Point point : pointsToChange) {
binaryImage[point.getY()][point.getX()] = 0;
}
and i change it to:
for(int a=0; a<pointToChanges;a++){
Point point = pointToChanges;
print (point);
}
does my code do the same thing as your code does?
from my understanding it does. im afraid i misunderstood it because i never met
condition for (Point point : pointsToChange) before.
For iterating through collections such for loops are used. this link may help
http://stackoverflow.com/questions/5228687/java-best-way-to-iterate-through-an-collection-here-arraylist
I couldnt understand what you tried to do in the code u wrote. i am afraid its not the same..
dear nayef,
i get the code run already. tq so much for your help. 🙂
Glad to be of help. 😀 you are most welcome.
Btw did you figure out what went wrong before?
yes i already figure out what went wrong.
when i trace back the code.
i figured out, you might using Collection Class
so i using
for ( int i = 0; i < pointsToChange.size(); i++) {
Point point = (Point)pointsToChange.get(i);
binaryImage[point.getY()][point.getX()] = 0;
}
to replace your code
for (Point point : pointsToChange) {
binaryImage[point.getY()][point.getX()] = 0;
}
now i get the result as expected.
tqvm sir. 🙂
Thank You i love you for ever
i tried your code, including the main class you mentioned in the comment section, but why is it that my output image is just pure white? it doesn’t have any black lines.
is your image a pure binary image?
i’m sorry about my previous comment. i tried using your tree image and it worked. it just didn’t work on my input image which is an unbinarized signature image of PNG format. does it only work on JPGs (same with your input)? i have yet to try it using a binarized version of my signature input.
same will work for png. you will have to specify png in ImageIO.write method
how do you return an image file from the 2d array instead of using ImageIO.write()? i plan to use the image for further processes.
make you method’s return type as Image and return the image in the end, instead of writing it to a file.
yes, it worked. But can we get exact thin image for a character image .?
i.e. if we have a image containing letter A with some thickness then resultant pixel array should also contain pixels in exact format of A. [In given program at some points pixels are vertical ] so that I will be able to get exact freeman chain code(8 directional) for this thin image.
Yes, the result image will have similar shape to the input image, just thin. I don’t think there will be any problem regarding chain code generation from the thinned image.
Thanks. I did a version in Python then created a Rosetta Code task based on the algorithm here: http://rosettacode.org/wiki/Zhang-Suen_thinning_algorithm
P.S. I think you have a subtle error in your implementation that one of the Rosetta Code contributors pointed out to me and I had to fix. you may have your Y axis inverted so, in effect, P2 to P9 start at the bottom and go anti-clockwise around P1 instead as you show it in your 8-neighbourhood diagram above.
I suggest you check out the RC talk page here: http://rosettacode.org/wiki/Talk:Zhang-Suen_thinning_algorithm
– Paddy.
Here is how a 2D array can be shown in java (with x,y as the center value)
[y-1][x-1] | [y – 1][x] | [y – 1][x + 1]
[y][x – 1] | [y] [x] | [y][x + 1]
[y + 1][x – 1] | [y + 1][x] | [y + 1][x + 1]
Before going into detailed discussion, you must understand
for a given point (x,y)
(y – 1, x) means the cell above (x,y) (P2).
(y – 1)(x + 1) means the upper right one (P3).
(y,x + 1) means the right cell of (x,y) (P4)…
(y – 1,x – 1) means the upper left cell (P9)
and so on
…. do you now see how P2 starts above (x,y) and NOT bottom ?
you can put debug points in my code and see how its working.
The RC example in the talk page is small enough to work out in your head. Try it with your program and check that you get the right result …
….. …..
.###. -> …..
.#?#. ..#..
….. …..
Surely the the cell labelled ‘?’ will be culled at step 1:
(Note that the spacing here will be off so check the Talk link above).
Hi again. I think you probably have an inconsistency and have positive y being in different directions when reading the image compared to when thinning.
Just try it on
00000
01110
01#10
00000
Where P1 is 1 at ‘#’
If your program generates the following then it is *wrong*:
00000
00000
00100
00000
before
00000
01110
01110
00000
after
00000
00100
00000
00000
you can run the code below to verify.
package thinning; /** * * @author nayef */ public class Main { /** * @param args the command line arguments */ public static void main(String[] args) { int [][] data ={{0,0,0,0,0}, {0,1,1,1,0}, {0,1,1,1,0}, {0,0,0,0,0}}; ThinningService thinningService = new ThinningService(); System.out.println("before"); for(int y =0; y<data.length;y++){ for(int x =0;x<data[y].length;x++){ System.out.print(data[y][x]); } System.out.println(); } thinningService.doZhangSuenThinning(data); System.out.println("after"); for(int y =0; y<data.length;y++){ for(int x =0;x<data[y].length;x++){ System.out.print(data[y][x]); } System.out.println(); } } }Hi again. The above is the right answer, but you hand code the “image” into your source. Did you do the same for your before/after image? I think your call to imageIO.read() may be flipping your Y axis as your stated “after” result above only comes from thinning when flipped.
Try using this:
int [][] data ={{1, 1, 0, 0, 1, 1, 1},
{1, 1, 0, 0, 1, 1, 1},
{1, 1, 0, 0, 1, 1, 1},
{1, 1, 0, 0, 1, 1, 1},
{1, 1, 0, 0, 1, 1, 0},
{1, 1, 0, 0, 1, 1, 0},
{1, 1, 0, 0, 1, 1, 0},
{1, 1, 0, 0, 1, 1, 0},
{1, 1, 0, 0, 1, 1, 0},
{1, 1, 0, 0, 1, 1, 0},
{1, 1, 0, 0, 1, 1, 0},
{1, 1, 0, 0, 1, 1, 0},
{1, 1, 1, 1, 1, 1, 0},
{0, 0, 0, 0, 0, 0, 0}};
And checking the 1/0 output after.
Thanks.
i hand coded here just to check your example, its not the way to use. my normal use case normally consists of a binary image, which consists of a 2D array of 0s and 1s. or in cases where i have a grayscale image and i binarize it and using threshold values, as you can find at
take a look at http://docs.oracle.com/javase/1.4.2/docs/api/javax/imageio/ImageIO.html , you will see image io doesnt give you a binary 2d array, you need to create one from the image you get. here is a code snippet for that,
 public static void main(String[] args) throws IOException {

        BufferedImage image = ImageIO.read(new File("/home/nayef/Desktop/bw.jpg"));

        int[][] imageData = new int[image.getHeight()][image.getWidth()];
        Color c;
        for (int y = 0; y < imageData.length; y++) {
            for (int x = 0; x < imageData[y].length; x++) {

// HERE YOU MAKE THE BINARY 2D ARRAY

                if (image.getRGB(x, y) == Color.BLACK.getRGB()) {
                    imageData[y][x] = 1;
                } else {
                    imageData[y][x] = 0;

                }
            }
        }

        ThinningService thinningService = new ThinningService();

        thinningService.doZhangSuenThinning(imageData);

        for (int y = 0; y < imageData.length; y++) {

            for (int x = 0; x < imageData[y].length; x++) {

                if (imageData[y][x] == 1) {
                    image.setRGB(x, y, Color.BLACK.getRGB());

                } else {
                    image.setRGB(x, y, Color.WHITE.getRGB());
                }


            }
        }

        ImageIO.write(image, "jpg", new File("/home/nayef/Desktop/bwThin.jpg"));

    }
}
as for the last input you gave here is the result
before
1100111
1100111
1100111
1100111
1100110
1100110
1100110
1100110
1100110
1100110
1100110
1100110
1111110
0000000
after
1100111
1000001
1000001
1000111
1000100
1000100
1000100
1000100
1000100
1000100
1000100
1000100
1111100
0000000
Hi again, that is the correct result! Notice it differs from the “after” in your main blog entry in the third and fourth lines down.
I suspect that there is an inversion of the Y axis somewhere in your normal input routines that is not present in your “int [][] data = …” code used in the comments.
This last method must be correct as you verified the small 4-line example by hand, so the method used to generate the “after” result of the main blog entry must be wrong somewhere.
Unfortunately I cannot go to deeply into your code as I mainly code in Python, and I suspect that finding the problem might involve you printing out the ones and zeroes of one of your small bitmap images in some way so that you can be sure of the Y orientation.
the binary input output in blog entry might be wrong as it was the first result, and later on the code was modified, sorry if it caused confusion, i replaced the old results with new one. hope it helps.
No, thank you for introducing me to the topic. I am glad I could repay the favour.
🙂
😀 thanks a lot for pointing out the problem with example data. It was very nice of you
“Black is denoted as 1 and white is denoted as 0.” Why? There is no reason to do so, and is inefficient because you need to loop through the pixels of the image 1 more time to turn them around. Best way is to denote black pixels as 0 and white pixels as 255. You would need to change your algorithm a little bit (In the conditions instead of multiplications you should do addition and check if result is more than 0xFF).
If you look at the equations and conditions for Zhang-Suen Thinning Algorithm you will understand why i need 1 and 0. the conditions and equations are based on the assumption that “Black is denoted as 1 and white is denoted as 0.” The conditions and equations are in this blog entry as well.
Try implementing your changes and comparing the code. I am not sure you will make the savings you state.
You are right. I did some tests, turns out that working with 0 and 1 is ~28% faster than working with 0 and 255. This is mainly because when working with 0 and 255, the getB function needs to do 1 extra division and 1 extra subtraction than normal. This overhead seems to affect the performance to a greater degree than looping through the image 2 more times. I’m sorry for speaking without making any tests.
More than 0x00* (or >= 0xFF). Sorry.
It’s working perfectly… Unfortunately it’s “six month late”…
I had to adapt Zhang-Suen for my handwritten signature verification thesis and I didn’t get a good result as yours in the thinning process, but thanks anyway…
hi nayefreza, your tutorial really help a lot, thanks for this article, it works for me. but just info when i’m using this code on android I need to change list into vector to make it works
Thanks you very much ! It is very helpful .
Hi sir,I use your tutorial in my code but it didnt get proper output.In your tree image you got a thinned image and also i get the same output.But my problem is that,how i can reduce more pixels and get more thinned image..I am working on a thumb recognition application.Please help me..
I think the image should be one pixel thick after thinning. Can you post your image after thinning?
Hi sir..I cant be able to post an image in your postbox.I sent you an email on your g mail..Please check.
I want a output in single line of pixels..
are you sure your image is proper black and white? i mean the pixels are either 255 or 0 and no other value?
On Wed, May 28, 2014 at 10:39 AM, Nayef's Blog wrote:
>
Ya sir,It is an proper black and white..
HI sir..my problem is solved..Actually it is not an binary image.So i Convert it into binary and then apply in your code.
Thanks ..
Glad to know it worked for you 🙂
Hi Nayef,
I have got this code successfully implemented in matlab and giving fine output. However, i would want to know how does zhang suen achieve thinning theoretically? . I would be grateful to you if you can explain to me the whys?
Like i get how they are two subiterations but
1. why are there two sub-iterations?
2.What is each sub-iteration responsible for?
I do understand how the pixels are removed when certain conditions are met but what exactly are we checking with the conditions?
this paper might help you http://www-prima.inrialpes.fr/perso/Tran/Draft/gateway.cfm.pdf
Plus the black and white thing. My code works perfectly fine with a blackbackground and the image being white.
but if i have a white background and the image that i want to be thinned as black then it doesn’t thin properly..
it should work when, Black is denoted as 1 and white is denoted as 0
Hi Nayef,
I want extract skeleton from a binary image. I beginning at image processing. I read your code but I can not understanding them. I was wondering please say what should I do? step by step.
Regards
Its working Thanks for sharing.. 🙂
Please something is missing in this code, mostly in the condition statement
if ( binaryImage[y][x]==1 2 <= b b <= 6 a == 1
(binaryImage[y – 1][x] * binaryImage[y][x + 1] * binaryImage[y + 1][x] == 0)
(binaryImage[y][x + 1] * binaryImage[y + 1][x] * binaryImage[y][x – 1] == 0)) {
pointsToChange.add(new Point(x, y));
//binaryImage[y][x] = 0;
hasChange = true;
}
And I guess its one of AND && operator or OR || operator
thanks for pointing that out. fixed it.
hello I need a little help from you …
any problem with this code?
is this algorithm use for the fingerprint recognition?
Depends on how you use it
Hi Nayef,
I don’t quite get this condition: P2*P4*P6 = 0 and P4*P6*P8 = 0. Isn’t it equivalent to:
P2*P4*P6*P8 = 0 ???
Saying strictly in CS field you can even do a bitwise AND:
P2&P4&P6&P8
Also, why not make a loop for the neighbours (B) + calculating the transitions (A) at the same time:
private static final int BLACK = 0xFF; // Make it 0x01 if you want.
private static final int WHITE = 0x00;
private static final int NEIGHBOURS_TO_CHECK = 9;
private static final int[] NEIGHBOURS_X_OFFSET = {-1, -1, 0, 1, 1, 1, 0, -1, -1};
private static final int[] NEIGHBOURS_Y_OFFSET = { 0, 1, 1, 1, 0, -1, -1, -1, 0};
private static int neighbours;
private static int transitions;
private static void getNeighboursAndTransitions(int x, int y) {
neighbours = 0;
transitions = 0;
for (int i = 0; i < NEIGHBOURS_TO_CHECK – 1; i++) {
final int neighbourX = x + NEIGHBOURS_X_OFFSET[i];
final int neighbourY = y + NEIGHBOURS_Y_OFFSET[i];
if (image.get(neighbourX, neighbourY) == BLACK) {
neighbours++;
} else {
final int nextNeighbourX = x + NEIGHBOURS_X_OFFSET[i + 1];
final int nextNeighbourY = y + NEIGHBOURS_Y_OFFSET[i + 1];
if (image.get(nextNeighbourX, nextNeighbourY) == BLACK) {
transitions++;
}
}
}
}
Or something like that. Didn't test it, but I think the idea is illustrated and clear.
Thanks, Greg.
I was wrong. The condition is not the same as P2*P4*P6*P8 = 0.
However I was able to program this algorithm in pure Java much much more optimized. It runs 10 times faster (depending on input) now. If anyone is interesting I can give the code. The places that wasted computational time were:
0) Four distinct functions that check the conditions in each step – done it with only one traverse in one function
1) allocating points and putting them in LinkedList – replaced with efficient buffering (though I realized it was better to use Java.nio buffers and not implement my own, newbie me 🙂 )
2) Traversing the whole image in each iteration. Instead I created a collection of foreground pixels. Iterating through foreground pixels gives huge savings.
I am interested in your code
you can provide link to your souce code
Check this out as well
http://tinypic.com/view.php?pic=mls1gl&s=9 (looks more like thined image)
http://tinypic.com/view.php?pic=2pos12f&s=9 (than this original one)
http://tinypic.com/view.php?pic=md0bv9&s=9 (this gets boundary part)